
Multi-Input, Rating Page and Results Page
Page types: multi-input, rating page and results page
In the previous sections we covered the main page types – list, input field, photo cards, slider and others. This article completes the overview of page types in a quiz with multi-input, the rating page and the results page.
📋 Multi-input
To add a multi-input, click «+» in the editor, choose «Add section» and select the «Multi-input» type.
Multi-input is a question type that lets you add up to 10 input fields on one page. Unlike a regular input field, it lets you get much more information from the user in a single step.
Available field masks:
- Name
- Phone number
- Address
- Letters only
- Numbers only
- Link
- Email address
Each field can be made required or optional – just click the asterisk next to the field.
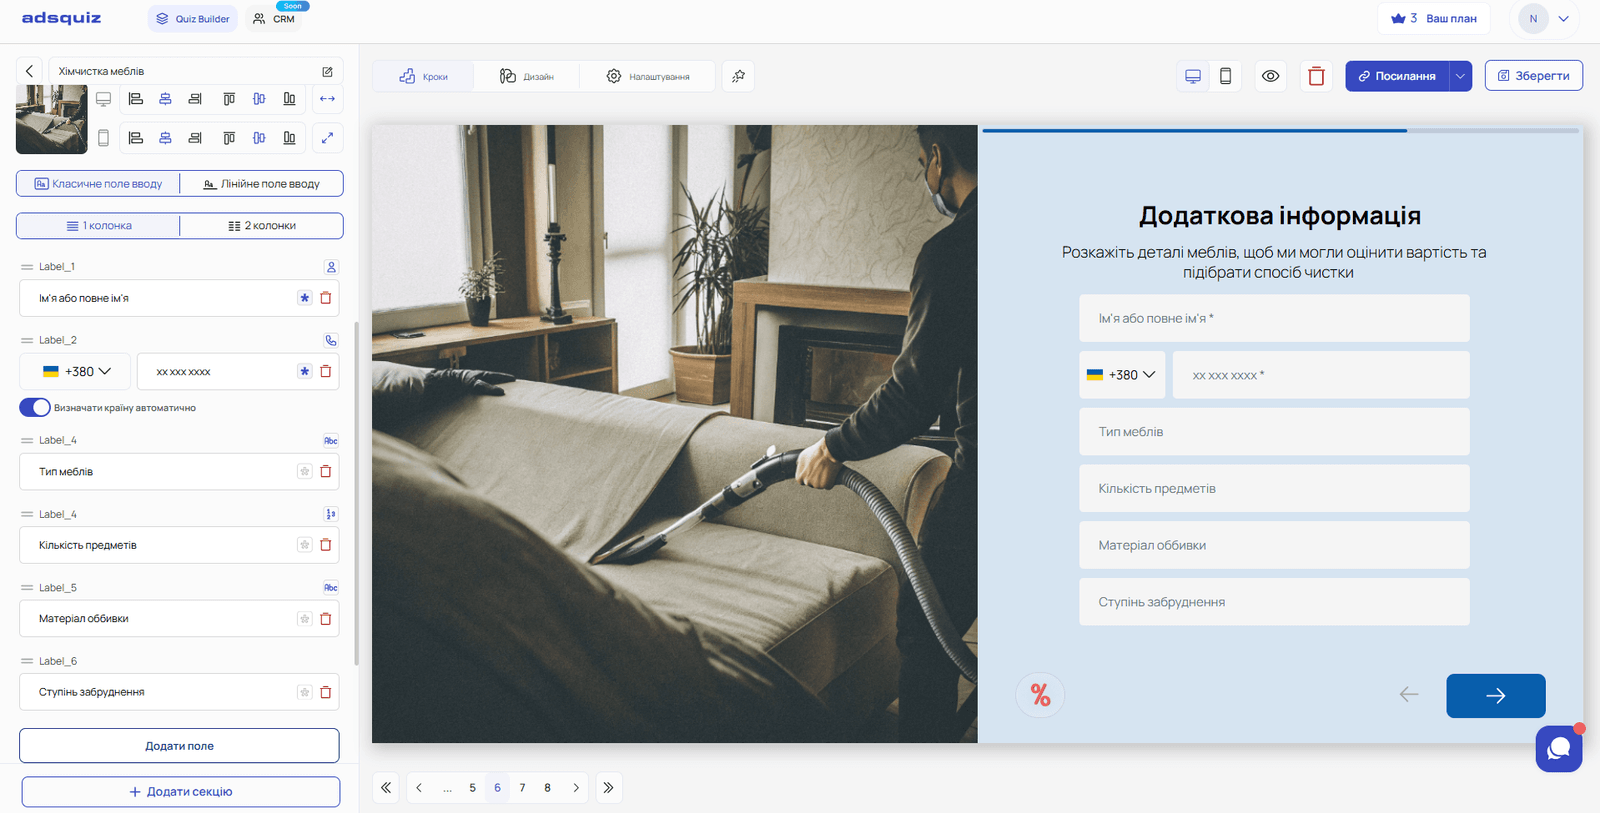
Field display style:
- Classic or line input field
- One or two columns – for a more compact layout on screen
When to use multi-input:
- Construction and renovation – site measurements: area, ceiling height, room type, wishes, contact person, phone
- Logistics and delivery – type of goods, weight, dimensions, packaging, preferred date, contact person
- Design and development – style, dimensions, placement, references, wishes, budget limits
- Medicine and beauty – name, age, complaints, allergies, contact phone
- B2B sales – company name, position, number of employees, current solution, budget
💡 Tip: Don't make all fields required. Keep only the critical ones required – for example, phone and name – and leave the rest optional. This lowers the psychological barrier and increases the form's conversion rate.
⭐ Rating page
To add a rating page, click «+» in the editor, choose «Add section» and select the «Rating page» type.
A rating page is an interactive question format where the user expresses their attitude or satisfaction through visual elements. It's a great way to collect feedback on your business, the quality of your services or products.
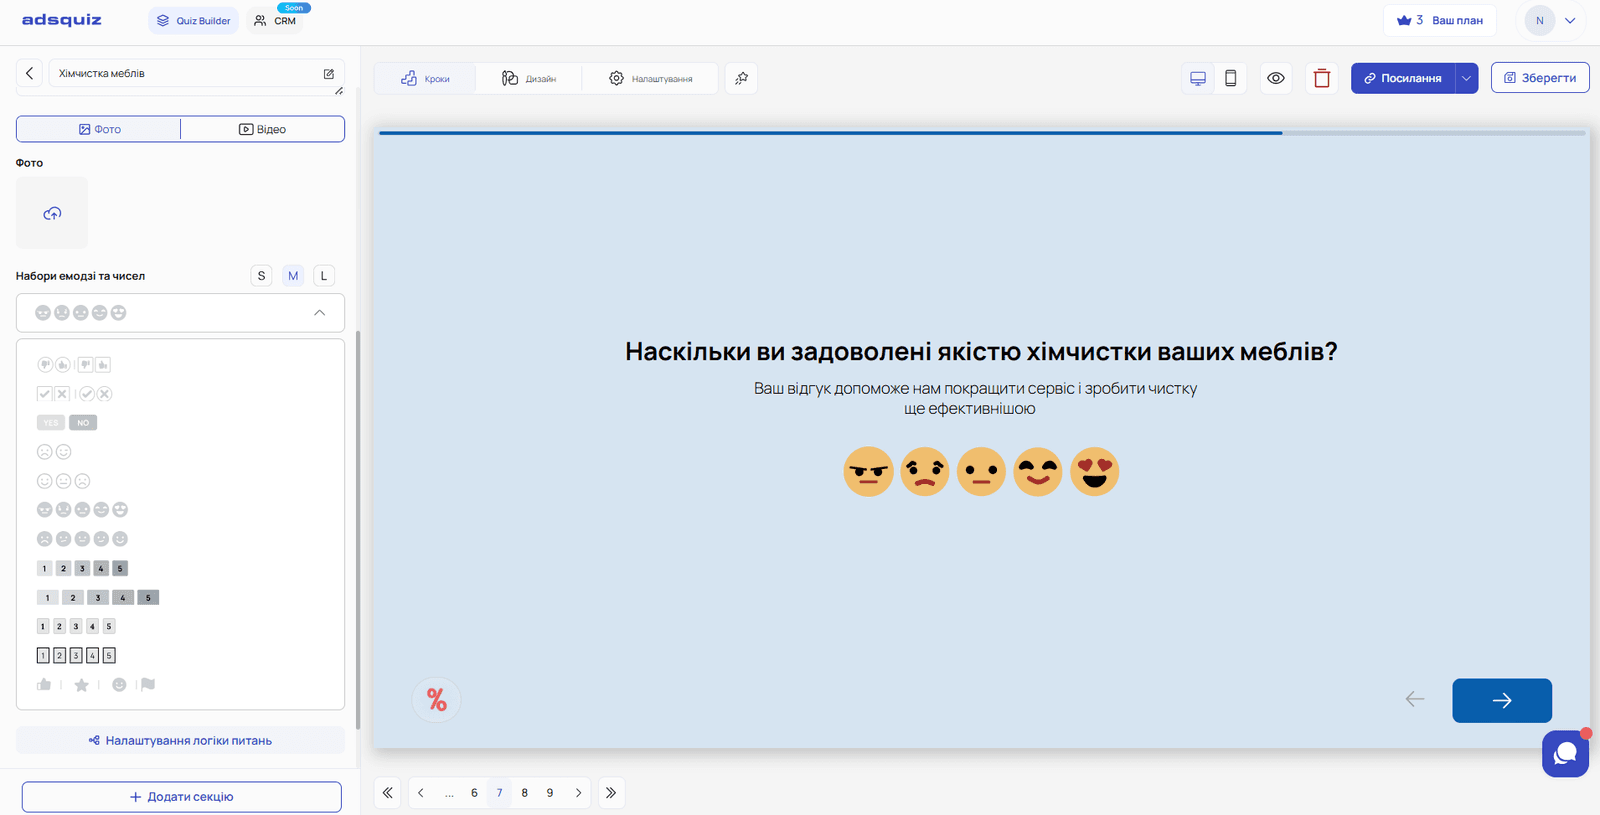
Available interaction elements:
- A five-point rating scale
- «Yes» or «No» answers
- Emoji reactions – different expressions to show mood or satisfaction
- Other visual rating formats
What you can set up:
- The question and its description
- The type of rating element
- Color and size of the elements – small, medium or large
- Whether the step is required
When to use a rating page:
- Post-purchase survey – «How would you rate the quality of our service?»
- Feedback after a service – «How satisfied are you with the result?»
- Recommendation survey – «How likely are you to recommend us to your friends?»
- Educational quiz – «How clear was this block?»
- Product rating – «How do you like the design of our new product?»
A rating page can be used both via a direct link to the quiz and embedded on a website with code.
💡 Tip: A «Yes/No» or emoji rating lowers the barrier to answering – the user doesn't need to think, one click is enough. This gets more completed answers than a text field.
🏆 Results page
To add a results page, click «+» in the editor, choose «Add section» and select the «Results page» type.
The results page is the final page of the quiz, where the user gets a personal offer based on their answers. It's one of the most important parts of a quiz – this is where completing the quiz turns into a request or an action.
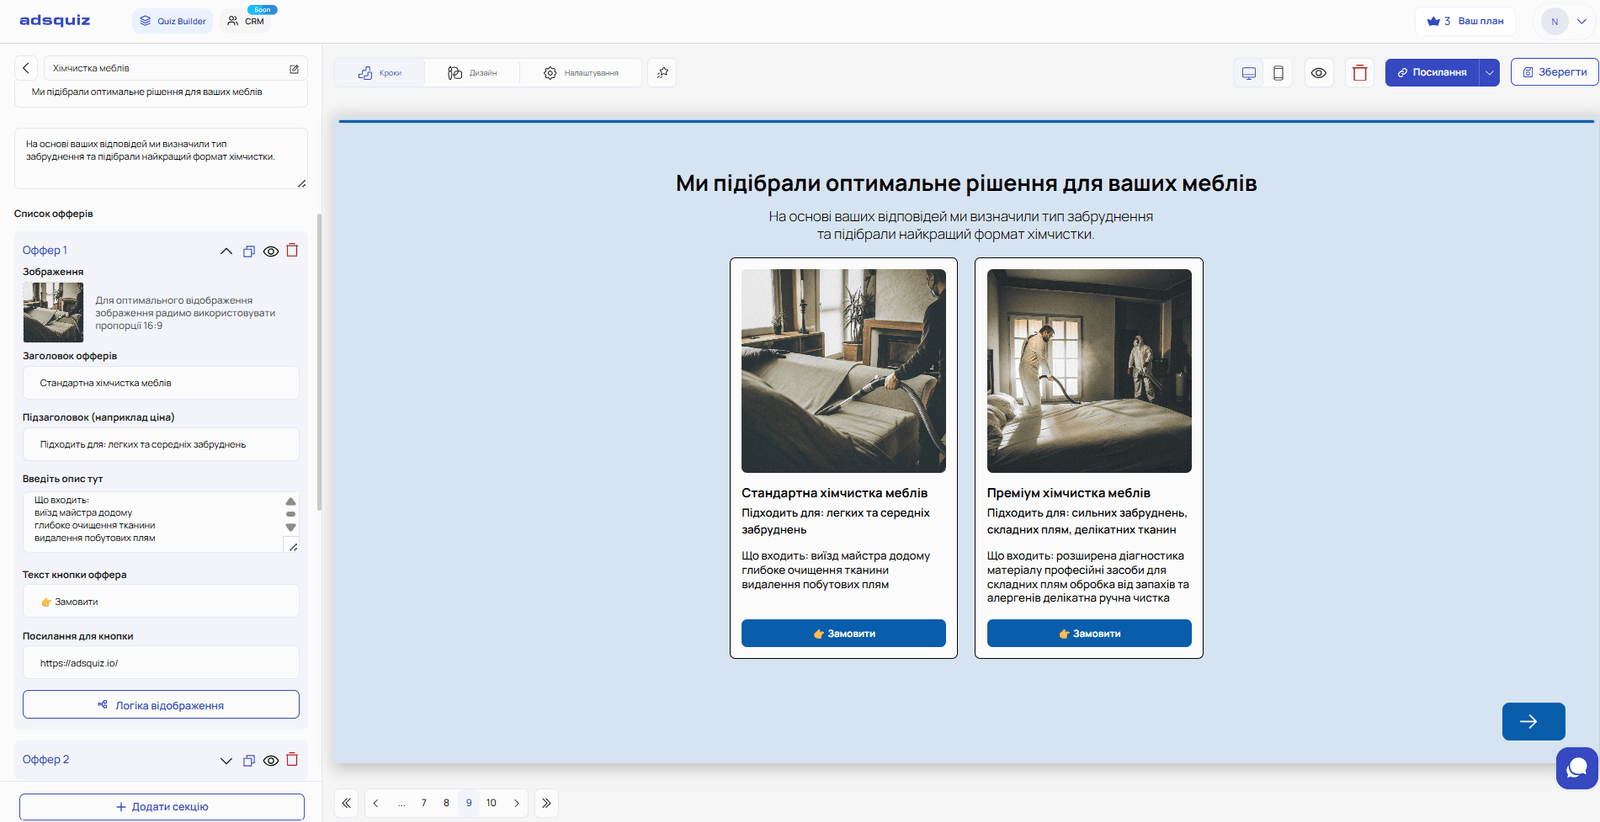
What you can set up on the results page:
- Headline – the main message for the user
- Description – longer text under the headline
- Offers – you can add several offers to one results page
What each offer includes:
- An image in 16:9 format
- Offer headline
- Subheading
- Description
- A button with text and a link
- Logic – set the conditions under which this specific offer is shown
When to use several offers:
If the quiz segments your audience, the results page can show a different offer depending on the user's answers. For example, an electronics store:
- the user says they're looking for a smartphone → the offer leads to the smartphones page
- the user says they're looking for a laptop → the offer leads to the laptops page
- the user says they're looking for accessories → the offer leads to the relevant section
This way one quiz replaces several separate landing pages and hits each user's exact need.
💡 Tip: Don't leave the results page empty or generic. The more specific and personalised the offer, the higher the conversion into a request or purchase.
⚙️ General settings for all question types
Each question type supports additional settings:
Question logic – set conditions for showing a question or moving on, depending on the user's answers. More details: Logic and branching
Points – assign points to each answer to build the final result. More details: Scores and results
Integrations – send the collected data to your CRM, Google Sheets or a messenger. More details: Integrations
❓ Frequently asked questions
How many offers can I add to the results page? There is no limit. We recommend adding as many offers as your quiz has audience segments – one for each segment.
Do all multi-input fields have to be filled in? No. Each field is set up separately as required or optional. Click the asterisk next to a field to make it required.
Can I set up different offers for different users? Yes. For each offer on the results page you can set display logic – depending on the user's answers, they'll see the offer that matches their needs.
Where is the best place for a rating page – at the beginning or at the end of the quiz? Usually at the end, after the main questions. But if the quiz is used as a satisfaction survey, the rating page can be the only or the first step.